ProofHub is an online project management software that helps teams collaborate and manages their projects effectively. It offers a range of features designed to enhance productivity and streamline work processes. One of the key features of ProofHub is its inbuilt time-tracker tool. This allows teams to track the time spent on tasks and projects, helping them monitor progress and manage their time more efficiently. ProofHub also provides a table view for better task organization. This feature allows teams to view tasks in a tabular format, making it easier to prioritize and manage tasks effectively. In addition to these features, ProofHub offers discussion and group chat functionality. This enables team members to communicate and collaborate in real-time, facilitating effective communication and enhancing teamwork.
How to manage project status reporting in ProofHub.
We must say that these reports are a quick and clear way to understand why a particular project has been selected. It also allows you to monitor the progress of the project. Next, let's see how to create a project status report. The first thing we have to do is to go to the dashboard of the tool. Once there, just click on Reports.

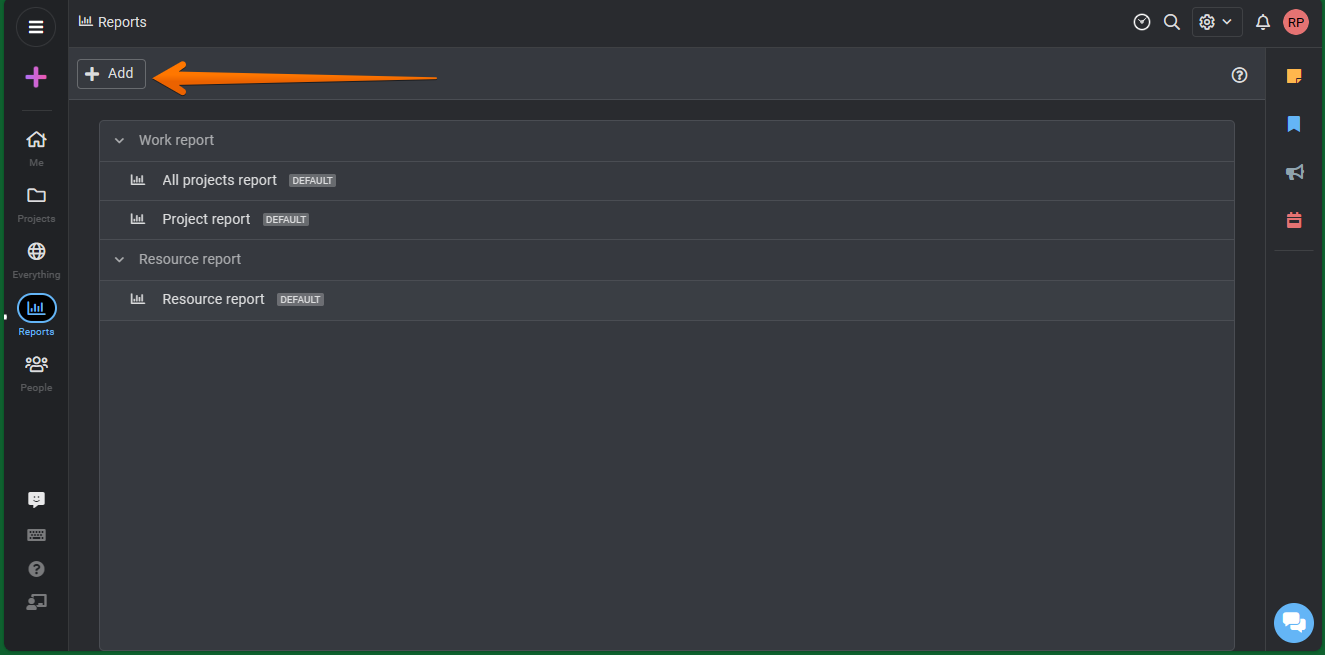
Consequently, you will be redirected to the reporting module. Consequently, all you have to do is click on Add..
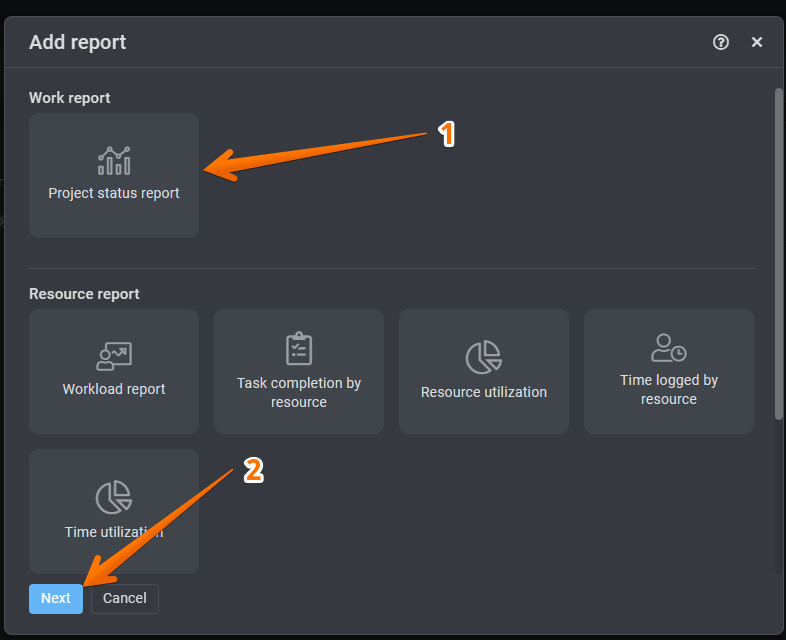
As a result, a floating window is displayed. From there, there are several options related to the Reports. However, the one we are interested in is the Project Status Report. Please click on it, and then click Next..
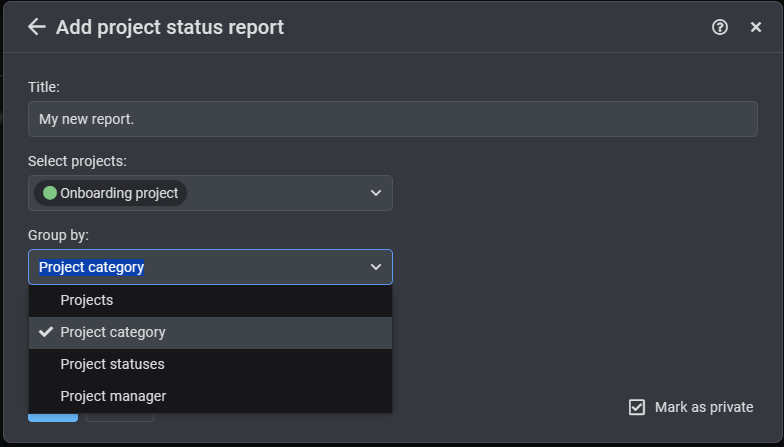
Next we are going to fill in the data related to the new project we are creating. Firstly, we are going to assign a name to it. Next, we select the specific project from which we will generate the report. Please look at the following image.
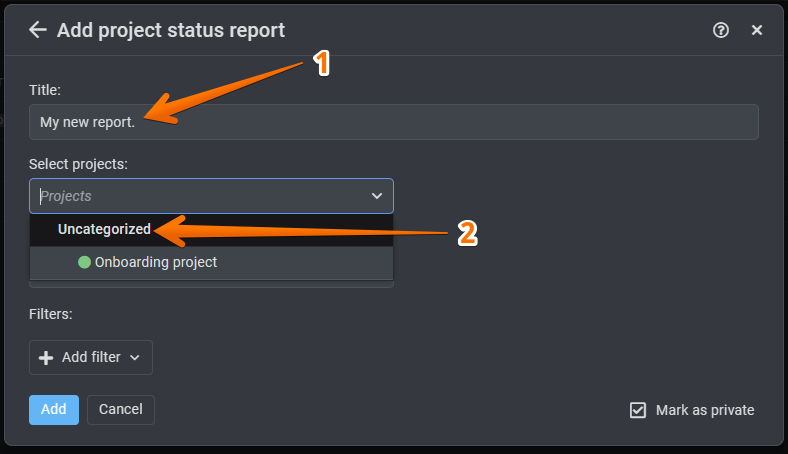
Next, it is time to establish the grouping mode according to the project.

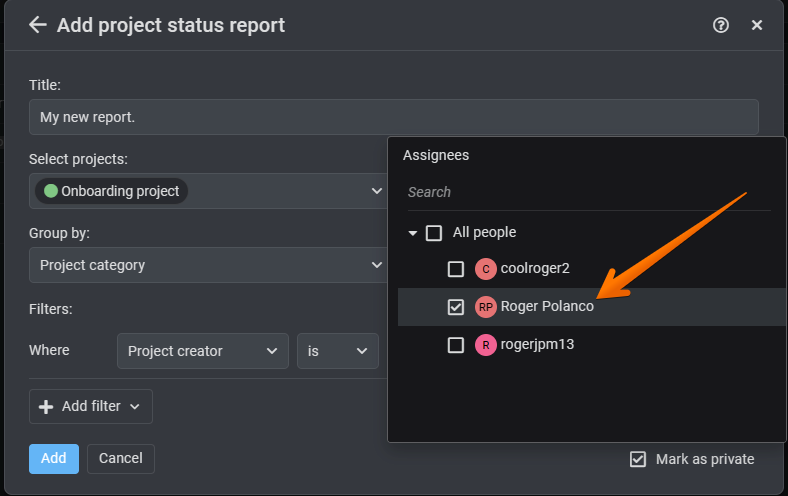
Next, we will set up filters that refine the location of the report. In this opportunity, we are going to filter it according to the creator of the Project.
What we will do now is to determine which of the users will serve as the Report creator. With this intention, a new floating window is displayed with the list of available users. Just select the corresponding user.
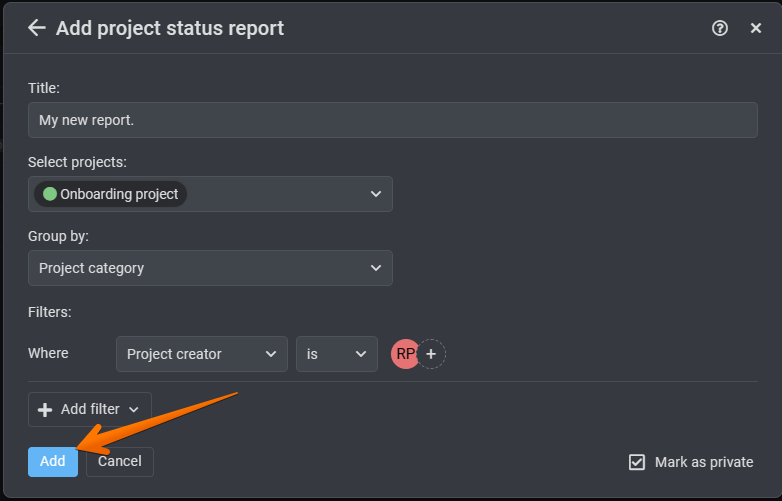
It is even possible to keep the report private. When you have reviewed the available options, just click to Add. to create the report.
After this action, you will be able to see the report successfully created.

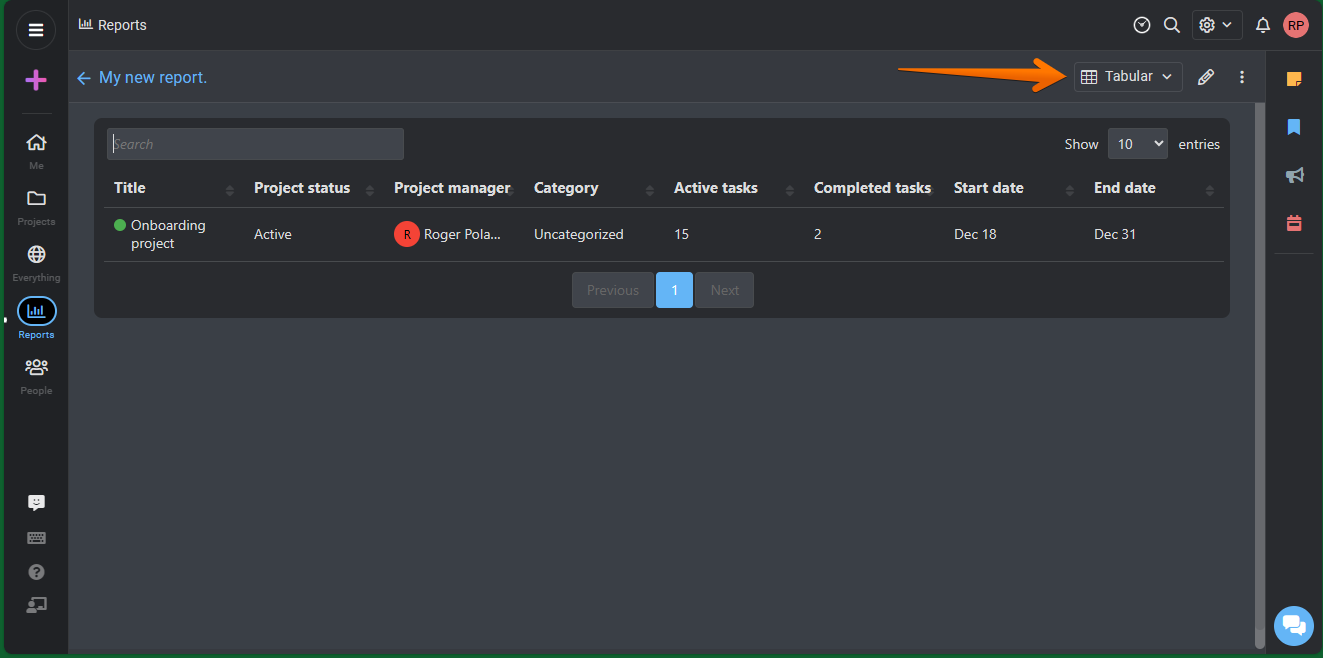
You can even modify the view and select a Tabular option.